Missile Command - Creating and Controlling Crosshairs in Scratch
This is part 2 of many which show how to implement a clone of the arcade game Missile Command in Scratch, the block based programming language. There are two things that I hope to achieve by the end of this article:
- Show you how to create a simple sprite which looks a little like cross hairs.
- Explain how easy it is to make it follow the mouse pointer.
1. Creating the Crosshairs
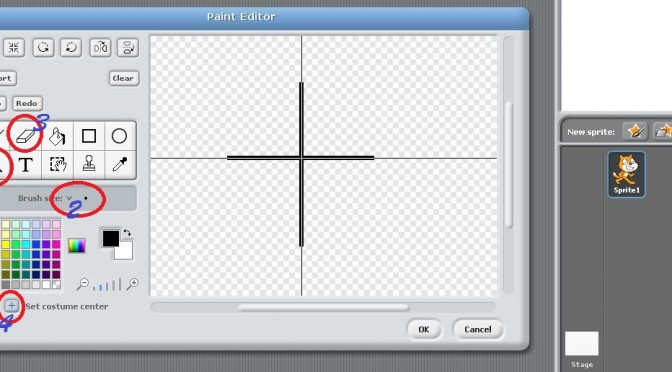
Have a close look at the screenshot above because that will show much of what we need to do for this section. The first thing (to bring this window up) is that you need to click on the button you can see in the first position, on the right of the image. It is the one next to “New Sprite:” and is of a brush inside a star. That is what you use to create new sprites in Scratch. Once that has been pressed, you will see the rest of image above.
For my crosshairs, I want it to be in the shape of a cross, using lines, so click on the line tool in the toolbar. I have labelled it with the number 1. You could next choose how wide the lines created would be (see number 2 ) but in my case, I left it as it was.
Using your best line-drawing-hand, left-click at the top, hold the button down and pull the mouse lower, to draw your line down. Next, find a place to the left and middle, and draw the line across the centre. Try to get it to have the same height and width below, above, to the left and right, of the centre.
My preference was for there to be a small gap in the centre so that I could see exactly where the shot would be fired. For that, I used the eraser tool (numbered 3), and then clicked right in the middle to delete what was there. Again, you can alter the size of the rubber using the part marked 2.
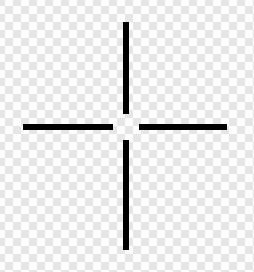
Removing the centre Almost there! We lastly need to make sure that Scratch knows where the centre of the sprite is. This is important because otherwise, when we rotate or move the sprite, it might end up a little off centre. For this, click where the number 4 is and drag the (real!) crosshairs, so that where they intersect (the centre) - it is right in the middle of your gap (if you have one). Click on the OK button, and we’re done. Can you see your sprite in the centre of the stage (the big white area to the right)? It’s too big or too small? No problem. Click on your sprite again, click on costumes (at the top, right under where it has the name of your sprite) and you should see this:
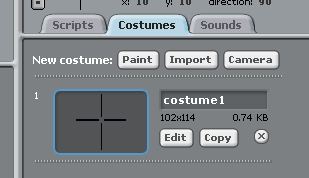
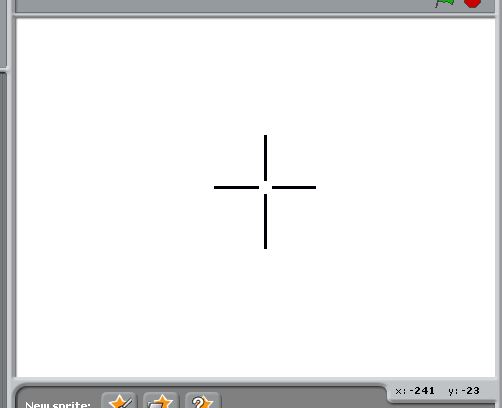
You can see that this has something called a costume and it is labelled as costume1. We’ll come back to these later, but for now, just click on edit. The way I did it, my sprite was too big, so I needed to shrink it. In my example below, you can see that it takes up a huge portion of the stage real estate.
You should now be back at the edit screen for the sprite. At the top left, you will see a row of tools. The first two control whether the sprite is increased in size or shunk. Repeatedly click on the one you need until the sprite is the size you desire.
Once finished, click OK, again. To make things neat and more readable, it is important to name our sprite and perhaps also to get rid of that cat.
Renaming it is simply a matter of clicking on the default name at the top (it will be something like Sprite2) and editing it
To remove the cat, right click on it and you will see a context menu like this:
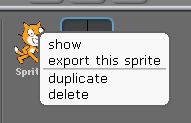
Click on delete and it’s gone.
2. Following the Mouse Pointer You might think that this is the trickiest part of the process but in fact, it is the easiest. Basically, you just need to tell Scratch that when the green flag is clicked, keep on moving to where the mouse pointer is. In short, do this:
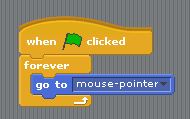
To find all of these blocks, look at the sections headings in the top left (known as the blocks palette) and click on those with the same colour. Also, when you first drag the goto command, you will not have the mouse pointer appear, so once it is in place, click on the drop down (the black triangle) and choose it.
To test your work, click on the green flag!
In the next post, I will be creating the anti-missile explosions that the defender will be firing and if you like, you can download the final project here: Moving Cross Hairs
Hi! Did you find this useful or interesting? I have an email list coming soon, but in the meantime, if you ready anything you fancy chatting about, I would love to hear from you. You can contact me here or at stephen ‘at’ logicalmoon.com