Adding an ASMX Service in Visual Studio 2013
This is a brief (and simple) introduction on how to add an ASMX service to your Visual Studio C# project. Before you begin, however, be aware that this type of service has been superseded by WCF, so if you want the latest and greatest, you might want to look elsewhere. I take it if you got this far, you still want to know how to add a service like this? That’s OK because they still exist and in some respects, are really easy to setup and use.
1. Getting An Address
The first thing to do is take the address of your ASMX service. For this example, I am going to use: http://www.webservicex.net/currencyconvertor.asmx Note the .asmx on the end? This service provides both a list of currencies and a way of obtaining the exchange rate between two pairs of currency, in real-time. That basically means it’s up to date, live and potentially very useful!
2. Adding A Reference
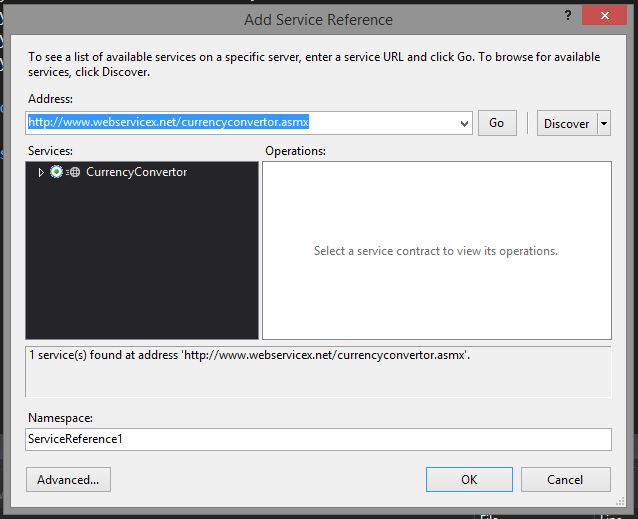
Next, inside Visual Studio, start your project (I used a console application) and go to the Project menu, followed by Add Service Reference, which should bring up this screen:

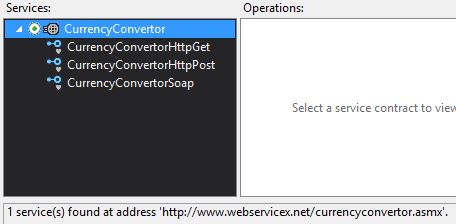
You can see where I have added the URL in the blue section. After that, click Go and wait while it interrogates that service to see what can be offered. The results of what were found are in and beneath the black box, above. Underneath shows how I expanded the services on offer (by clicking on the triangle):

Finally, give the service a name you would prefer, rather than ServiceReference1. I chose CurrencyService.
3. Choosing an End Point
In this case, I found that it had created two end points in my config file. When using ASP.NET, it was stored in Web.config and for this example (remember: a console application), it was App.config. Here’s what the App.config section dealing with this service contained:
1 | <client> |
The endpoint I used was CurrencyConverterSoap which is in the first endpoint, labelled with name. Remember that because you will need it soon.
4. Adding a Using Reference
We’re almost ready for some code but before you can use the service, you need to add a using statement to your code:
using ASMX.CurrencyService; |
You can see the name of the service that I used, prefixed by “ASMX.”
4. The Code
Now for the fun part…this is where it gets more specific to what you intend to do and the service you use, but in my case, to use the currency exchange rates, I need to instantiate the Soap client.
1 | static void Main(string[] args) |
Here, line 3 instantiates the client and is where you can see that name I asked you to remember, earlier. Line 4 calls the method ConversionRate which takes two currencies and returns a double indicating the exchange rate between the two. That’s it…we’re done! I said it wasn’t painful.
Hi! Did you find this useful or interesting? I have an email list coming soon, but in the meantime, if you ready anything you fancy chatting about, I would love to hear from you. You can contact me here or at stephen ‘at’ logicalmoon.com