Using VS Code to Create a 6502 Hello World
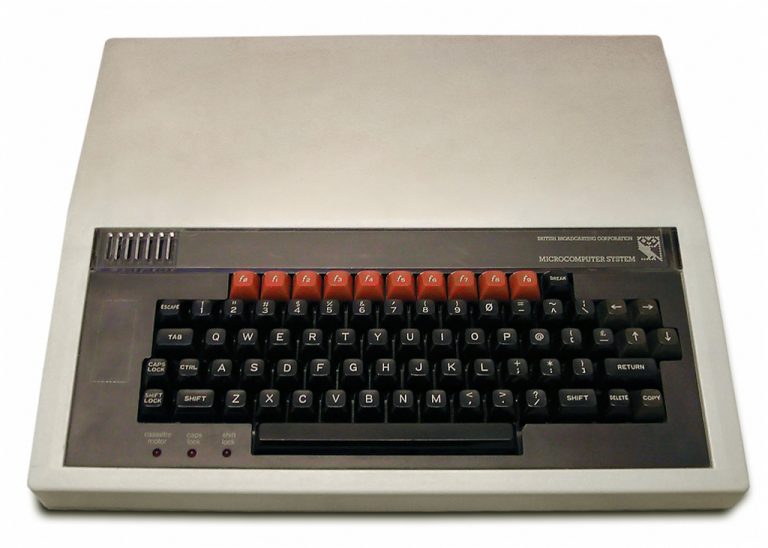
Some of you will be looking at this title and thinking: “What the…?“. Others will be transported back in time to little beauties such as this:

So what exactly is making me write about a 30+ year old 8-bit computer named the BBC Micro? Well, an interesting talk this week by Jason Nicholls titled: Retro Computer Games with PowerShell at Powershell London UK, if you must know.
The gist of the talk was how he uses PS to manipulate CSV files such that they can be used to create binary data for lookups in games that he is creating; all good stuff, but for me, it reminded me of some of things I used to do as a lad. Wait there whilst I just get my pipe and slipper - you can tell I am about to test your ability to remain alert, here!
I used to love writing assembly language tools and routines in my early teens. In fact, I almost got a game going by creating several layers of sprites moving on screen in a space invaders like formation, but not much more came of that. Then there was the time we began hearing about replicating virii and my friend and I actually created a piece of code on old 5 1/4 inch floppies that could transfer itself onto other disks automatically. We would also rip music out of games and hunt for the routines where they decremented lives, replacing it with NOPs (no operations) so that we could live forever.
For anyone that lived through the 8-bit revolution, and to me, it really was just like that, you know exactly what I mean. Seeing some of the tools Jason used made me wonder, though: could I rekindle a little of that fun I had? This is what this post is about - how to use VS Code to write a small 6502 (the name of the processor) assembly language routine to print the string Hello, World.
Sounds simple AND exciting, right? Well, it is sort of but hopefully if you follow these steps, you will avoid some of the pitfalls I had in setting up the environment, which made it a little painful at times.
Let’s start by assuming you have VS Code installed and it’s up to date with the latest release.
Download the Tools
Next, download a BBC assembler and emulator. The first tool is what will turn your 6502 assembly language into machine code and the second will run it. For the former, I just cloned the repo into a folder and the other was installed via an installer.
Add the Paths
- Make sure paths to both are in your PATH environment variable. Control Panel > System and Security > System > Advanced system settings > Environment Variables… at least on a Windows PC.
- After that, click on Path, then Edit…
- Add two new path variables pointing to the directories you installed the tools in, above. OK your way back out.
You can test both work by opening up a command window and then typing beebem and beebasm as separate commands. Did they do anything? If they didn’t, go back to your PATH variable and apply some pressure (aka do it again!).
Installing the Extension
This is the extension that will recognise the 6502 assembly language, colour code it, and allow us to assemble and run it.
- Run VS Code.
- Press Control-Shift-X.
- Search Extensions for Beeb VSC.
- Install it.
Creating the Assembly File
- Create a folder called _bbc-micro _somewhere suitable.
- Create a file in that folder named: test.asm and then copy in the source code below, before saving:
1 | oswrch = &FFEE |
I’ll talk about what this does in a short while, but for now, just keep moving on through the steps.
Assembling the Code
- Make sure you are on your source file and press F10, then choose test.asm. This will create a build target for you.
- Press F7 to assemble the code.
- Lastly, press F9 to run it.
The Output
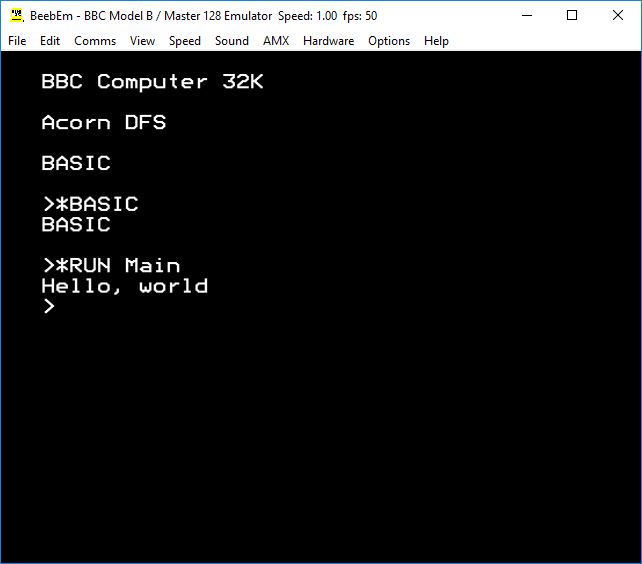
If all the above went to plan (and I hope it did!), you should have something as spectacular as this.

Pretty amazing? I think so :-)
For those of you that are interested, let’s talk about how the code works, though please note this isn’t meant to be a tutorial in assembler - just a taste. The basic idea is this: we are going to take each letter of the string “Hello, World“ and one by one, output them to the screen using a hardware character printing sub-routine. Let’s break that down in a little more detail, now. To start, we point to the beginning of the text, labelled: _message. _
1 | .message |
EQUS is just a short hand for placing strings as bytes, but what about the 13 and 10? 13 is the ASCII character for carriage return which means move to the beginning of the line. 10 is the line feed character which then makes the cursor drop a line. The zero is key however, but let’s not get ahead of ourselves. You then take the first byte (or character), place it into something called the accumulator (a kind of box, but properly known as a register).
1 | LDA message, X |
and in machine code we ask, are you a zero? If you are, I know we are at the end of the string in message, and can stop. That part is achieved here:
1 | CMP #0 |
where finished points to the instruction: RTS and means, return from subroutine. The BEQ part is a short-hand for branch if equal, meaning, was what was in the accumulator equal to what we compared it to (0)? What if it isn’t a zero, though? Well, we’ve already taken the character, we now need to call an operating system subroutine which will output it. That happens with thes
1 | oswrch = &FFEE |
The first line is just a kind of constant pointing to the part of the ROM (read only memory) memory’s address that handles character output and expects to find what you want to show in the accumulator. What actually makes it happen is the JSR part which is short for jump to sub-routine. So we now have a character on the screen and need to point to the next one. Once there, we go back to the beginning as in a loop and start again:
1 | INX |
INX? That’s a bit a I didn’t mention. That just increments another box (register) called the X register and I just use that as a offset from the start of the message. On the first pass, it is equal to zero:
1 | LDX #0 |
so we take the byte (character, remember?) from message plus whatever number is in the X register. When it is zero, we look at the first byte at message. When X is 1, we look at the second, and so on. That pretty much sums it up. Clearly assembler is much more laborius than something like C# in which would implement the above easily with:
1 | System.WriteLine("Hello, World"); |
but where is the fun in that? :-)
Hi! Did you find this useful or interesting? I have an email list coming soon, but in the meantime, if you ready anything you fancy chatting about, I would love to hear from you. You can contact me here or at stephen ‘at’ logicalmoon.com