Disabling Browser Cache With Chrome in Visual Studio 2017

When debugging a web application in Visual Studio 2017, I kept running into a problem whereby Chrome was caching a CSS file I was using. Here’s a quick tip to stop it happening so that you can focus on your changes, rather than scratching your head wondering why something isn’t changing!
In short, the trick is you can set up the default browser to run with a command line to disable caching, and here’s how.
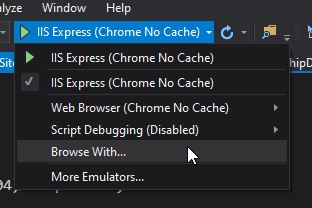
Find the browser menu in Visual Studio on the menu bar. It will look like this.

Click on Browse With...

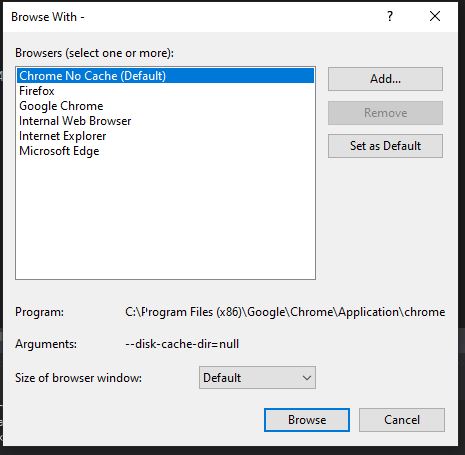
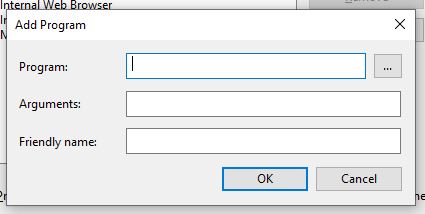
Now click on Add... and you will see the Add Program dialog.

Under each of the settings, add these values, altering the path if your Chrome installation is different.
Program: C:\Program Files (x86)\Google\Chrome\Application\chrome.exeArguments: –disk-cache-dir=nullFriendly name: Chrome without cache
Now Click OK
Once out of that dialog, you can also select the item in the list and set it as the default browser, if you choose.
Finally, click on Cancel to close the window.
From now on, you should be able to debug/browse without caching being an issue.
Hi! Did you find this useful or interesting? I have an email list coming soon, but in the meantime, if you ready anything you fancy chatting about, I would love to hear from you. You can contact me here or at stephen ‘at’ logicalmoon.com